A computer has provision for input and output, and a way to store the programs which process the input and determine the output.
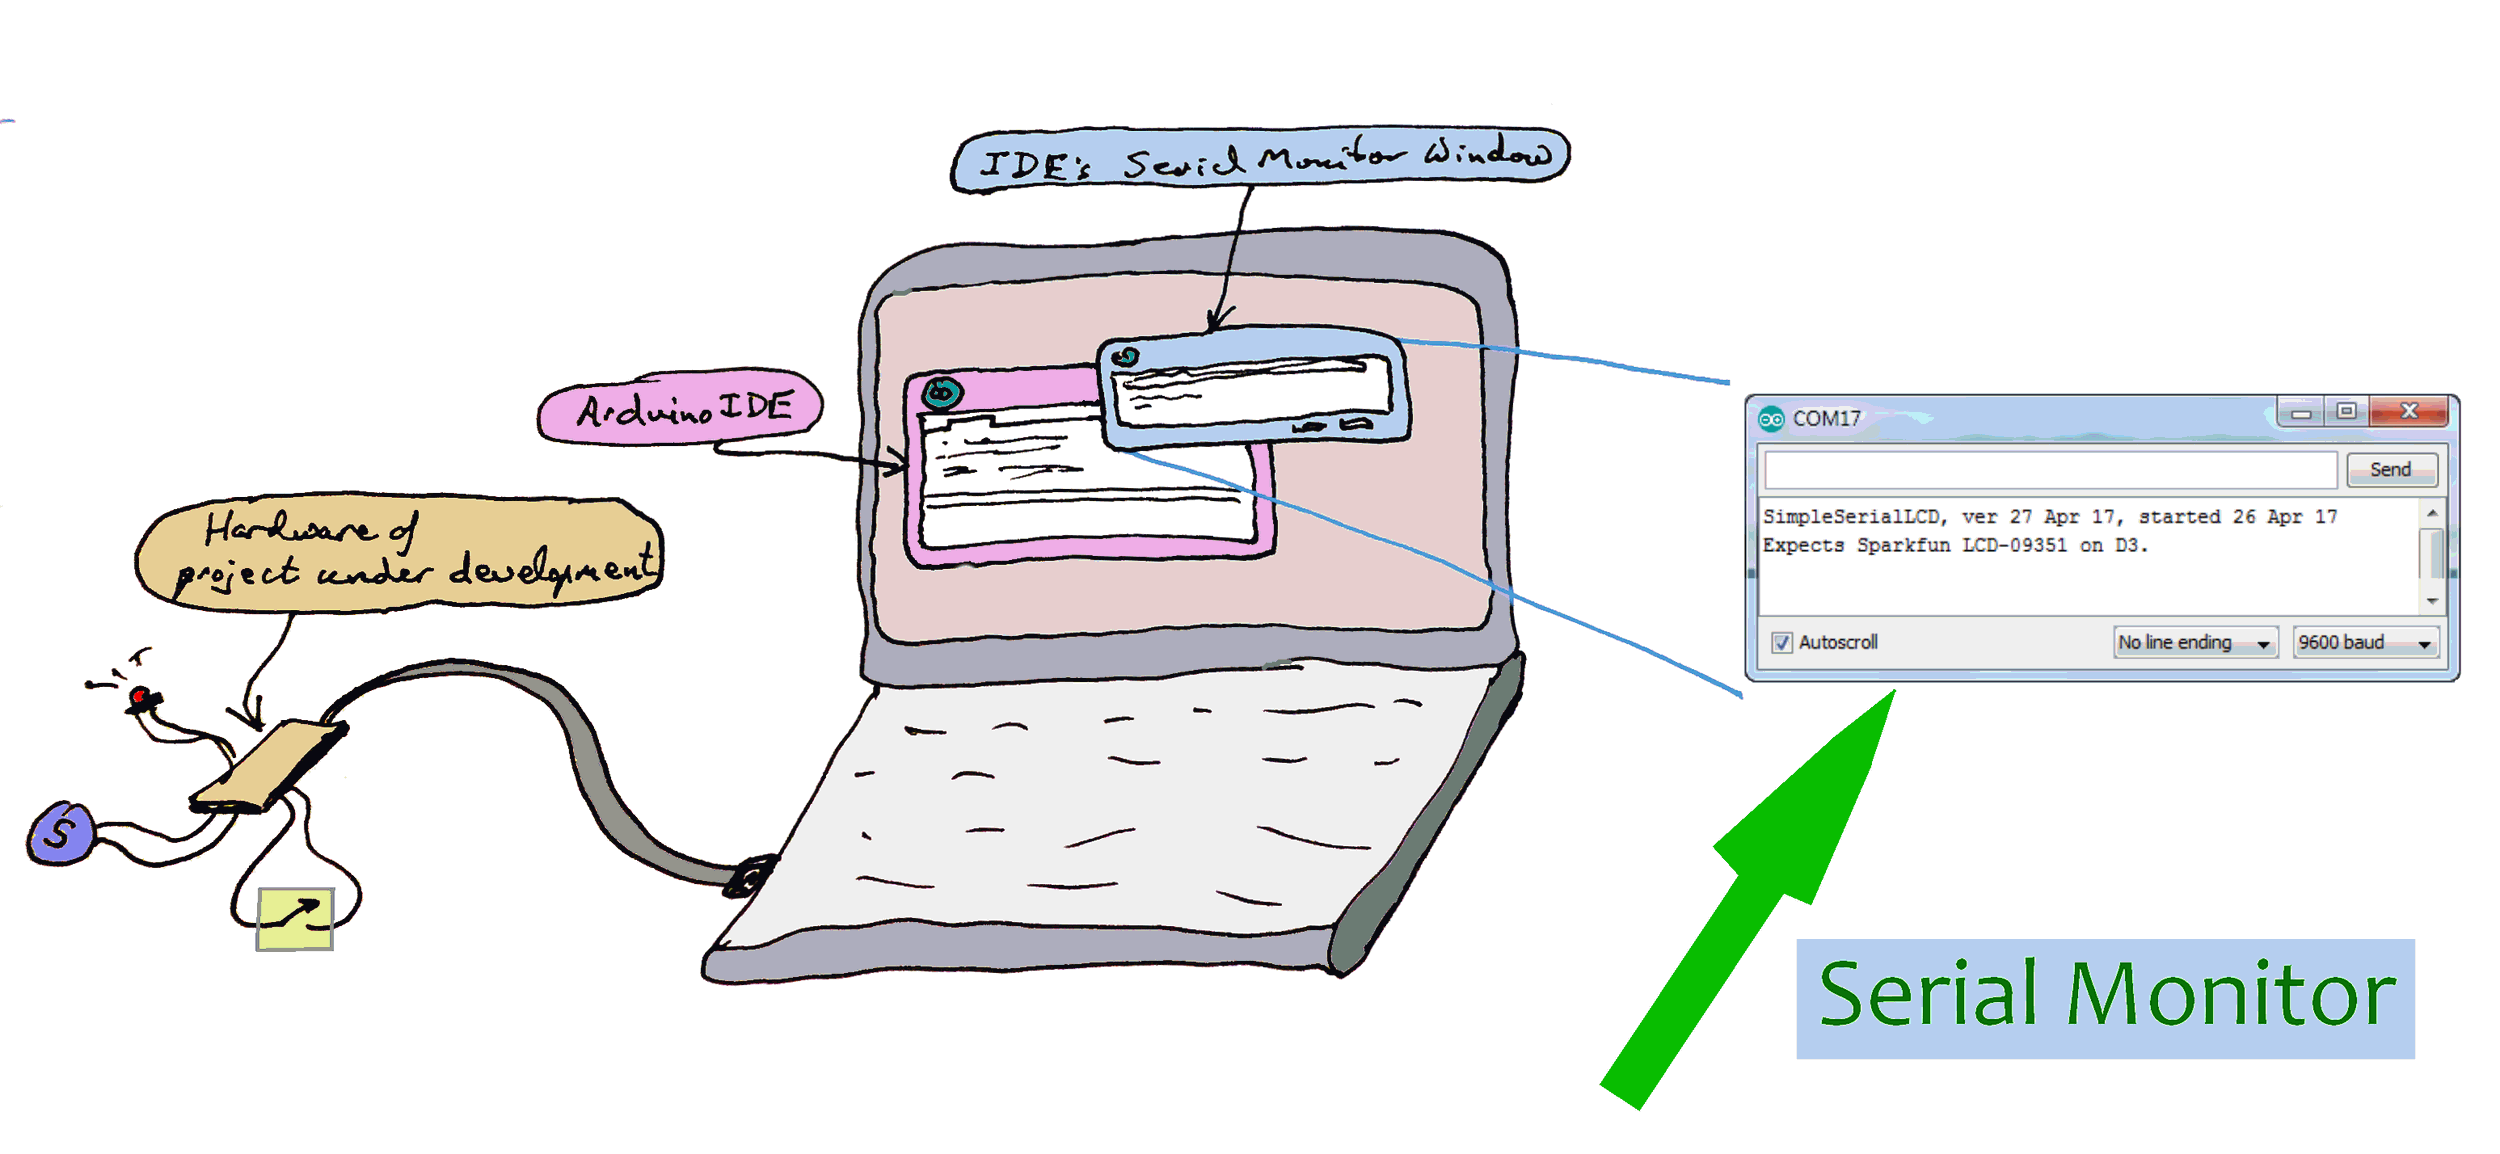
The text you see in the serial monitor window, the one shown enlarged, at the right, is just a sample. That text was specified in the code being put into the Arduino under development. And what if, later, nothing is connected to the relevant pins? Nothing! The Arduino won't "care" if you aren't "listening" when it "speaks".
(If you already know about this use of the Serial Monitor, what about using it to send data to the connected Arduino? I also have notes for you on using the Arduino IDE Serial Monitor to send data to the Arduino from the development machine.
An Arduino with one push button and one LED is a computer... but even your friends may ask you what that's good for.
You can make a quantum leap on the output front without buying anything beyond the basic Arduino. This How To tells you about using the output half of the serial stream.
"Serial" and "RS-232" are NOT just two ways of saying the same thing. RS-232 comms do use serial data, so you might think that you can just hook up the serial "stuff" I'm going to talk about... including your Arduino... to RS-232 devices. Or to the RS-232 port of a big PC. NOT SO!! (They can be connected... but there are a few details to get right.)
All the ins and outs of that are beyond the scope of this tutorial. I've inserted this warning just in case someone is tempted to "extend" the ideas here, hook an Arduino directly to something RS-232... and fry their Arduino! (If you want to connect to RS-232, search on "Arduino MAX323".)
The serial monitor lets you see anything the Arduino sends to its serial port. (When I speak here of "its port", I mean one built into most (all?) Arduinos (and clones), used for programming the devices. On traditional Arduinos (Uno, Pro Mini, etc), it uses pins 0 and 1.
As I just said: These pins are also connected to the electronics which the Arduino development environment uses for programming the Arduino. Don't worry... you can use them both for the programming task, and for the serial monitor at (almost) the same time. (With care, they can even be used for more things, but that's a story for another page.)
Before I go on... this page is about the relatively simple... and broadly useful... use of the serial monitor. Other "stuff" can be sent to and from other hardware, including big PCs, over a serial channel, to a program running in the other hardware. That is all a bit beyond just using the serial monitor, but I mention it in passing, in case you wondered. I have pages for you on serial communications between Arduinos and other hardware. (anywhere you see "Delphi" there, you can probably substitute "Lazarus".)
As I said, this page is about using the serial monitor to watch "stuff" going to the development PC from the Arduino.
Enter the following and run it. We'll do something more useful in a moment, don't worry.
int x = 0;

void  setup()
{
  Serial.begin(9600);
  Serial.println("Hello world");
  delay(2000);// Give reader a chance to see the output.
}


void loop()
{
  Serial.println(x);
  delay(500);
  x=x+1; // (Yes, I know there's a more clever way....
      //this page is about the serial monitor, remember?)
  if (x>5) {x=0;};
}
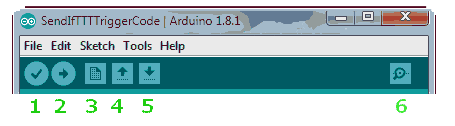
Wait until the usual "Binary sketch size..." message comes up in the pane at the bottom of the Arduino integrated development environment ("IDE"). Then click on the "Serial Monitor" button, the "magnifying glass" I marked "6" in the diagram below. (It shows the top of the Arduino IDE window.)
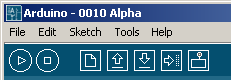
(And, just in case, below: The old interface. The "Serial Monitor" button was the right hand icon, the one like an upside down window shade.)
After you click on the right icon, the bottom pane of the Arduino development environment will clear, and after a short wait... 6 seconds on my BBB just now... you should see "Hello world". Two seconds later you should see 0, then 1, then 2, then 3... each on their own line. The Arduino will count to 5, and then start again at zero.
The example above counts from 1 to 5. Most of us, on a good day, can do that without the computer! The example was just to get you started with serial monitor.
You should care because the serial monitor can be very helpful when debugging things.
Imagine that you are working on a large Arduino program, and it isn't doing what you want. Say the program looks like.....
void  setup()
{
}

void loop()
{
  for (int i=0; i <= 25; i++){
        analogWrite(PWMpin, i);
      delay(10);
  for (int i=50; i <= 100; i++){
          analogWrite(PWMpin, i);
        delay(10);
  for (int i=150; i <= 200; i++){
          analogWrite(PWMpin, i);
        delay(10);
}
.... and you're not able to figure out how many of the "for" loops it is completing, not able to deduce if the loop function is executing at all? More than once? What!?
Add.....
Serial.begin(9600);
... to the setup function, and then alter the loop function, making it....
void loop()
{
  for (int i=0; i <= 25; i++){
        analogWrite(PWMpin, i);
  Serial.println("First loop done");
      delay(10);
  for (int i=50; i <= 100; i++){
          analogWrite(PWMpin, i);
  Serial.println("Second loop done");
        delay(10);
  for (int i=150; i <= 200; i++){
          analogWrite(PWMpin, i);
  Serial.println("Third loop done");
        delay(10);
}
Now as the program executes, you'll get messages, on the serial monitor, which will tell you how far it has progressed.
Not only can you output simple text messages like "First loop done", but you can tell the program to output the values in variables which you are interested in.
Having established and filled a variable called "iTmp", you can do....
Serial.println(iTmp);
(Contrary to my usual policy, that snippet wasn't checked. Do please get in touch if you discover a typo or "gotcha".)
We've seen how data can be sent from the Arduino to the development PC... the "big computer" where the code is written, compiled, etc.
It is also possible to send data the other way. Let's say you are building a system to control a fan. The system will "watch" a temperature sensor, and turn the fan on when the temperature rises above some value.
While building this project, you could program everything so that things typed on the development PC while the Arduino program was running would pass to the Arduino via the serial monitor, and be seen, acted upon, by the Arduino program.
Look at the image at the top of the page, the screenshot at the right of that. See the edit box at the top of the dialog, the one to the left of the "Send" button? That's where you put the stuff you want sent.
Once you get into the habit of using the serial monitor, consider seriously including something like the following in your code, right after the serial stream is set up...
Serial.begin(9600);//Set up serial stream
delay(100);
Serial.print("Welcome to ");Serial.println(sPrgmName);
Serial.print("Version: "); Serial.println(sVersID);
To support that, elegantly, someplace else, near top of program code is good place, you maintain....
String sPrgmName="MouseTrap Number 99"
String sVersID="vers 20 Feb 17"
Or, not as elegant, just make the first bit of code...
Serial.begin(9600);//Set up serial stream
delay(100);
Serial.print("Welcome to MouseTrap Number 99");
Serial.print("Version: vers 20 Feb 17")
The reason I call this more "direct" solution inelegant is that the relevant lines will be buried deep within your code, and when it is time to change the version ID, laziness may win. By using the strings, as long as you fill them near the top of the code, it is easy to find them when it is time for a change.
No, of course, you won't always have the Arduino connected to a big PC and the serial monitor turned on. But the code above does no harm in those circumstances. (Unless you want to use the pins associated with it for other things.) And when you DO have the serial monitor connected, the program and version information can be very useful.
(You can, however, connect something simpler in it's place, if all you need is to see internal documentation messages.)
I hope this tool proves useful to you in your development work. There may even be times when you find it useful in a finished project, but of course that would only be a project where your PC remained connected to the Arduino while the Arduino did whatever you set it up to do. Perhaps not a scenario which is going to arise often, but there's no reason it couldn't ever arise.
If you visit 1&1's site from here, it helps me. They host my website, and I wouldn't put this link up for them if I wasn't happy with their service.
Click here to visit editor's Sheepdog Software (tm) freeware, shareware pages.
Click here to visit the homepage of my biggest site.
Click here to visit the homepage of Sheepdogsoftware.co.uk. Apologies if the "?FrmAht" I added to that link causes your browser problems. Please let me know, if so?
![]() Page has been tested for compliance with INDUSTRY (not MS-only) standards, using the free, publicly accessible validator at validator.w3.org. Mostly passes.
Page has been tested for compliance with INDUSTRY (not MS-only) standards, using the free, publicly accessible validator at validator.w3.org. Mostly passes.
AND (almost!) passes...

....... P a g e . . . E n d s .....