 Bookmark this on Delicious
 Recommend to StumbleUpon
This page is "browser friendly". Make your browser window as wide as you want it. The text will flow nicely for you. It is easier to read in a narrow window. With most browsers, pressing plus, minus or zero while the control key (ctrl) is held down will change the texts size. (Enlarge, reduce, restore to default, respectively.) (This is fully explained, and there are more tips, at my Power Browsing page.)
Page contents © TK Boyd, Sheepdog Software, 3/13.
Using the MySQl Command Line Client is an excursion to the Stone Age.
But if you are new to MySQL server work, or if you are struggling with an uncooperative system, especially if you are just setting up a new MySQL server, you might want to make that excursion... there is very little in the Command Line Client to go wrong. If you can't make a table this way, there is probably something fundamentally wrong with some aspect of your MySQL server's set up... be it the server itself, or the users set up for it, or their permissions, or some firewall/ anti-malware setting or other. Wouldn't it be nice to get all of those things right... before you start on the journey that is getting a nice GUI MySQL client running? It won't run properly until those other things, and its wants are met.
The test outlined below is for when you've already accomplished several other things. It can probably be adapted to other environments, but to use it exactly as set out below...
(I suspect that a quick tweak of the shortcut that launches the MySQL Command Line Client would allow you to run it as a less- than- root user. You can probably also "switch down", and change the user you are using, after starting the session as "root". Stories for another day!)
You need to understand that, in the context of what this page is about, "a database " is more than just a table. A database may not have more than a mere table, but "the database" is the container, which may gather together multiple related tables.
I have written other tutorials about getting a MySQL database server set up. Go to them, if you haven't got the "Before you try..." elements in place.
Assuming you have those elements in place....
If you reached this page in the course of working your way though the larger fabric of my MySQL set up web pages, you may already have created a database called "tkb13mardemo". If not, here's how...
You should find a shortcut to that in the MySQL folder in your "Start/ All programs" list. (If not, please send me an email... I encountered a little mystery while writing this up for you.)
The command line client is similar to, but not the same as the OS, or DOS, command line window... and just as annoying. (Once upon a time, we did everything in such windows. Shudder.)
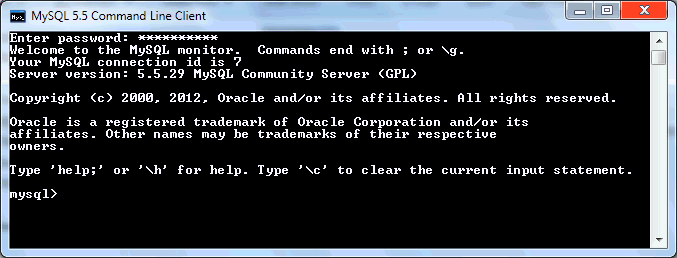
Start the command line client. You should get a window with a black background, white text, and a request for your password... whether or not the MySQL server is running.
If the MySQL server is not running, the client just disappears after you enter your password and press enter. I told you the command line client was annoying. (Use services.msc to see if server running, and start it, if it isn't.)
The response isn't instant, but after only seconds, not tens of seconds, you should see... "Welcome to the MySQL monitor...."
In my example, I'm going to create a new database called tkb13mardemo.
Enter the following into the MySQL Command Line Client/ Monitor, adapting tkb13mardemo if you wish to... but if you change that, you will have to make corresponding changes in lots of other places. "Copy/ paste" works... but not always as you would hope. For "Paste", if a right click on your mouse doesn't bring up a menu, try seeing if ctrl-v will work. (The latter didn't work... for me.. today...)
create database tkb13mardemo;
If you forget the semi-colon at the end, you will just get another "->" prompt... at which point you can supply the missing semi-colon, at which point you should get "Query ok, 1 row affected".
So... now either you just made a database called "tkb13mardemo" on your server, or you have one from before.
If it isn't up and running already, get the MySQL Command Line Client up and running.
Enter...
use tkb13mardemo;
(If you get "Unknown database" look to see if you just made a typo. If not, the database you thought was there on the server isn't, or for some reason is not accessible to you.
You should get "Database changed", to confirm the success of your command.
(A reminder of a quirk if the MySQL Command Line Client: You can't use ctrl-V to paste, but you can use right-click.)
Now we are going to create a very basic table. It will be called "basictablebyclc", and will have two fields. The first will hold integers, the second will hold up to 25 characters of text. The first is called RecNum, the second TxtField
CREATE TABLE basictablebyclc (
         RecNum INT,
         TxtField VARCHAR(100)
       );
MySQL Command Line Client isn't completely uncooperative... you can split that line across several lines, which helps with reading what you've done in your session. Just remember to put a semicolon at the end of the final "physical line" of the whole, one, logical "line". If you forget, you will just get a "->" prompt, and you can supply the semicolon then.
If the table is successfully created, you should see "Query OK, 0 rows affected." (No, I didn't know we were running a query, either... but it is a little like a query, in some ways, I suppose.
The MySQL Command Line Client understands a command "show tables;", if you want to double check that some result has arisen.
It isn't "necessary" here... but as all you have to do is some copy/ pasting, you can even put some data in the table, if you wish...
INSERT INTO basictablebyclc
   (RecNum, TxtField)
   VALUES
   (1,'Fred'),
   (2,'Mary'),
   (100,'Giles'),
   (110,'Uncle Tom Cobley');
When you do that, you should see...
Query OK, 4 rows affected
Records: 4 Duplicates: 0 Warnings:0
So! You can do MySQL!!! (^_^)
What the heck... we might as well do one more little thing....
SELECT * FROM basictablebyclc;
... should give rise to...
+--------+------------------+
| RecNum | TxtField         |
+--------+------------------+
|      1 | Fred             |
|      2 | Mary             |
|    100 | Giles            |
|    110 | Uncle Tom Cobley |
+--------+------------------+
4 rows in set (0.00 sec)
(You can do select/copy from the MySQL Command Line Client, by the way... just be sure to take your blood pressure pills first. Although ctrl-V won't work to paste things into the Client, you need to use ctrl-C to copy selected text out! Selecting text is called "marking". Right click. Click on "mark". Drag out a box over what you want to copy. Release mouse button. Do ctrl-C.
We did it! In earlier tutorials, we got a MySQL server set up. In this tutorial, we used a Very Basic tool (read "not many things to go wrong") to establish that our MySQL server works.
I wouldn't, however, want to use the MySQL Client for "everyday" interaction with the databases on my server, though! And so the next stage is to set up and learn to use other clients.
You already have one! (If you've been following my tutorials, and if MySQL Workbench will work on your machine.) If it is a Windows XP machine, you may find that MySQL Workbench won't work on your machine. But it "should" work (ha!) on Win 7, Linux, Mac.
(For XP users, MySQLAdministrator... not the most Google-friendly name!... allows server admin. I haven't checked... but I bet it allows basic client activities, like the ones we've played with, too.)
You can... with more blood, sweat, and tears, access a MySQL database with PHP.
You can access a MySQL database with phpMyAdmin, if it is available to you.
But the way I usually access my MySQL served databases is by using the database which is part of the wonderful, free, multi-platform "Open Office" suite. (The RDBMS there is called "Base". Again, not a brilliant choice of name, but, what can you do?)
I have written many tutorials on using Base, the Open Office database. Virtually all of them are relevant to using it as a front end to a MySQL database server. And, to make the learning journey more tolerable, you can use Base without any MySQL database involvement. If you wanted "just to try" Base, you would use it with its "embedded" database engine. Your tables would be held on the machine your Open Office suite is installed on. They would be "wrapped up" (zipped) into a file, along with all related forms, queries, etc, etc, each time you saved the database. (Records are saved... sort of... as soon as you leave the record involved. But if you have a machine crash, you may lose recent edits. From time to time, as in any computer work, it pays to save your Base session.)
When you are ready, or need to, move on from Base- With- Embedded- DB- Engine, there is "a bit" of work to do, to get the MySQL server set up, and to get Open Office's Base connecting to databases served from it. But for the actual user of a database on a MySQL server, there's little to "give away" that the user is no longer using the embedded engine.
Have you heard of Flattr? Great new idea to make it easy for you to send small thank you$ to people who provide Good Stuff on the web. If you want to send $$erious thank yous, there are better ways, but for a small "tip" here and there, Flattr ticks a lot of boxes which no one else has found a way to do yet. Please at least check out my introduction to Flattr, if you haven't heard of it? "No obligation", as they say!
I dislike 'fancy' websites more concerned with a flashy appearance than for good content. For a pretty picture, I can go to an art gallery. Not everyone has fast broadband.
I present this material in a format aimed at to helping you USE it. There are two aspects to that: The way it is split up, and the way it is posted..
Please remember the material is copyright. (TK Boyd, 2006 and later) The procedures in the page just cited are suggested only for convenient personal use of the material, however, also....
Feel free to use this information in computer courses, etc, but a credit of the source, quoting the URL, would be appreciated. If you simply copy the pages to other web pages you will do your readers a disservice: Your copies won't stay current. Far better to link to the original pages, and then your readers will see up-to-date versions. For those who care- thank you. I have posted a page with more information on what copyright waivers I extend, and suggestions for those who wish to put this material on CDs, etc. (There is at least one prison using Sheepdog Software/ Sheepdog Guides material for inmate education. Situations do exist where good internet connections are not possible!)
Translations are welcomed. Tell me about yours, so I can post links to it. (More information at the page about copyright waivers.)
PLEASE >>> Click here to visit editor's Sheepdog Software (tm) freeware, shareware pages <<< PLEASE
If you liked this tutorial, see my main webpage for more things from the same author.
Editor's email address. Suggestions welcomed! - - - Want a site hosted, or email? I like 1&1's services.
![]() Page WILL BE tested for compliance with INDUSTRY (not MS-only) standards, using the free, publicly accessible validator at validator.w3.org. Mostly passes. There were two "unknown attributes" in Google+ button code. Sigh.
Page WILL BE tested for compliance with INDUSTRY (not MS-only) standards, using the free, publicly accessible validator at validator.w3.org. Mostly passes. There were two "unknown attributes" in Google+ button code. Sigh.
. . . . . P a g e . . . E n d s . . . . .