This is one of a number of articles which attempt to help people have fun with Arduinos.
It addresses a use of the sometimes under-used "serial monitor", which is a software tool built into the Arduino IDE.
It follows on from an earlier article which introduced the Arduino serial monitor. The earlier article showed you how to send text to the serial monitor. (By the way... there's also a tool which draws graphs from numbers from the Arduino. That's accessed via Tools/Serial Plotter.)
In this article, I will show you how to send data in the other direction... You'll type things on keyboard of the laptop in the middle of the illustration, and the Arduino will "see" what you typed as soon as you press "enter".
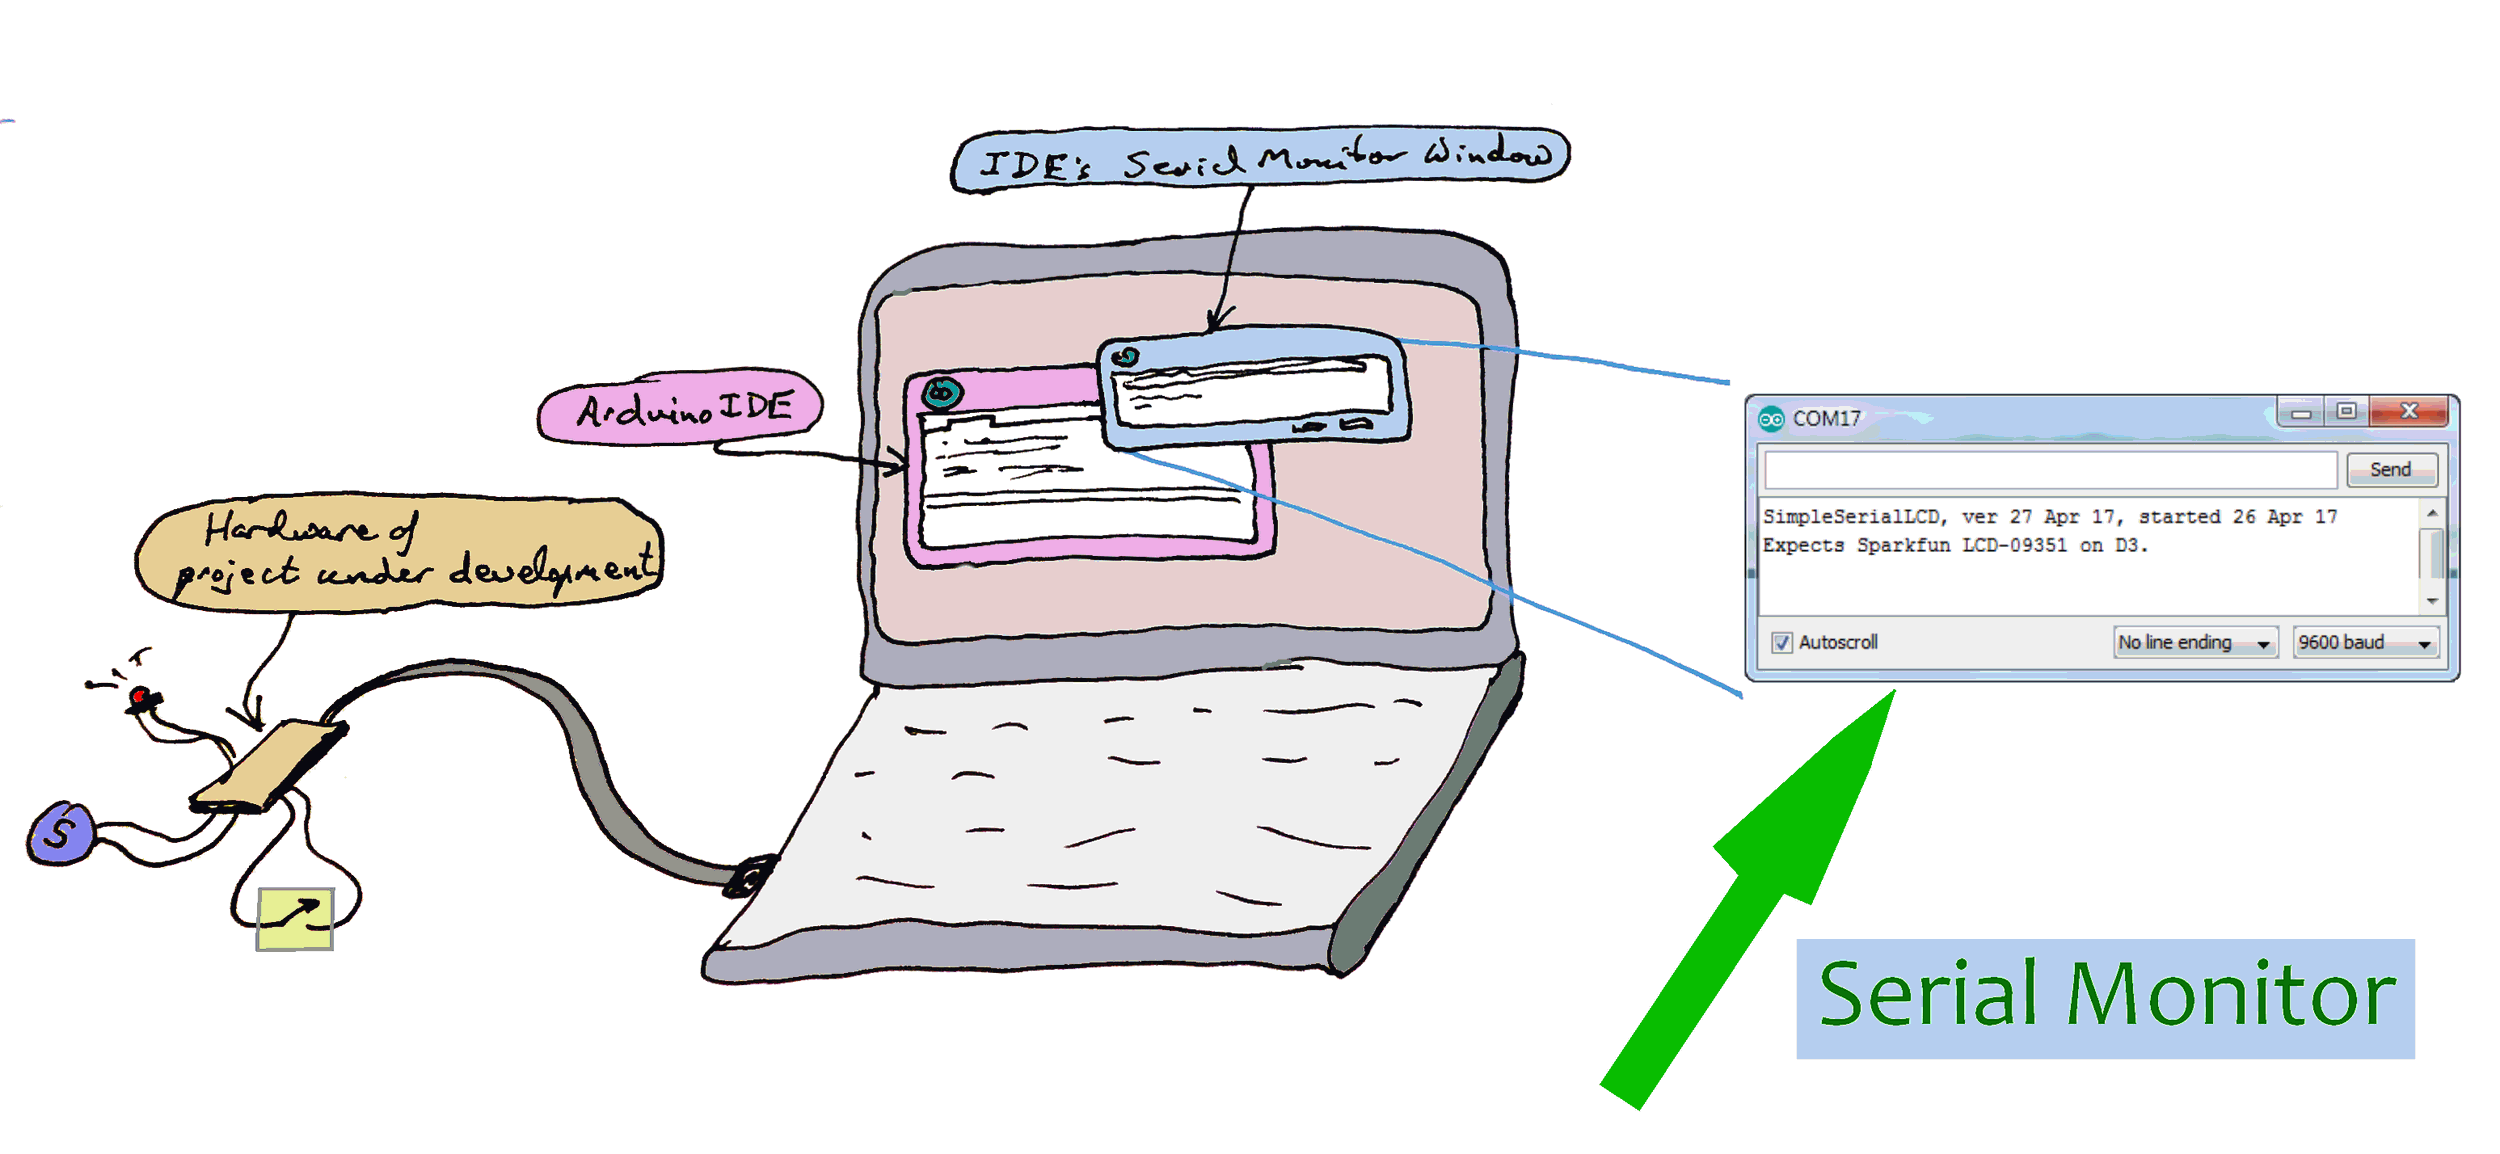
Look at the right-hand third of the illustration. It shows the serial monitor window, enlarged. The text you see is a sample of output from the Arduino. That text was specified in the code put into the Arduino under development. But we're not doing that today.
Besides letting you see messages from the Arduino, the serial monitor also allows you to send things to the Arduino.
Sadly perhaps, but necessarily I suspect, pressing a key (or two, or more) doesn't send it to the Arduino immediately. Your input is only sent when you then press the "enter" key. The upside of this is that if you want to send, say, "Hello Arduino", you can type that... getting it right along the way (hurrah for the backspace key!), and then send the "finished message" at the moment of your choosing.
We're going to create a tiny program, just to illustrate the basics. For that you only need an Arduino with an LED on pin 13. Thus, most people won't need to connect anything, as most Arduinos have a built-in LED on pin 13.
==============
The "bad news"? (Obvious(?) when you think about it.) This approach to sending characters to the Arduino only works when it is hooked up to "the big computer" used for programming the Arduino. (If you want to connect a keyboard to an Arduino, for use when it is not connected to the big computer, have a look at the USB Host Controller Board V2.4, which you can buy (£15, +p&p, 2/17) pre-loaded with a USB Keyboard to serial stream of ASCII from Hobbytronics.co.uk.)
Don't be alarmed at how "long" the following is... a lot of it is just comments!
(When viewing this on some devices, you may have to scroll down the page a little to see the code....)
V
V
/*Ar796-v1-0 * Version: 06 Feb 18 * Started: 06 Feb 18 * * Demo getting input from big PC's keyboard, * using Serial Monitor * *Derived from the very clear tutorial at... *https://startingelectronics.org/software/ * arduino/learn-to-program-course/19-serial-input/ * *The LED was put on pin 13 to take advantage of the * "built in" LED present on many Arduinos. No * other external hardware is needed. * *The program only "works" when the Arduino is hooked * up to the Arduino, running in a "big" computer. * *You need to open the Serial Monitor window, and click * in the edit box near the top of that. Press "a" * and "enter", and the LED should flash. * *Serial Monitor: *http://sheepdogguides.com/arduino/aht1serimoni.htm */ const byte pLED0=13; char chFrmSerial; void setup() { pinMode(pLED0,OUTPUT); chFrmSerial=0; Serial.begin(9600); }//end of setup() void loop() {2 if (Serial.available() > 0) { // Is a character available? //Note: It won't be "available" as soon as you type it... // You have to press "enter". THEN the whole line is // sent, be it one letter or more. (They would be sent // one letter at a time. chFrmSerial = Serial.read(); // There was! Get the character //Now use it... if (chFrmSerial="a"){ digitalWrite(pLED0,HIGH); delay(30); digitalWrite(pLED0,LOW); //Think: Why no "delay(30)" here? }//end of if chSerial=='a' } // end: if (Serial.available() > 0) }// end of loop()
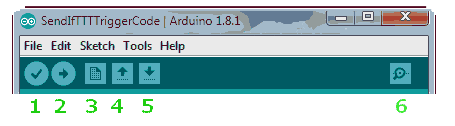
Wait until the usual "Binary sketch size..." message comes up in the pane at the bottom of the Arduino integrated development environment ("IDE"). Then click on the "Serial Monitor" button, the "magnifying glass" I marked it "6" in the diagram below. (It shows the top of the Arduino IDE window.)
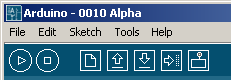
(And, just in case, below: The old interface. The "Serial Monitor" button was the right hand icon, the one like an upside down window shade.)
That should bring up a new window, something like...
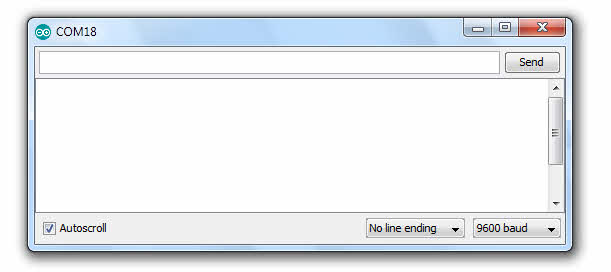
Click in the narrow band ("edit box") at the top of the Serial Monitor window. The box just to the left of the "Send" button. On your big computer's keyboard, type an "a". Watch the LED on the Arduino, and, still watching that, press the "enter" key. The LED should flash... and I hope you can see what made that happen?
That's it! Unleash your creativity!
A few things that might get in the way...
a) Remember: The text in the edit box is not sent until you press the big computer's "enter" key. (Clicking the "Send" button is as good. Try that!)
b) In the program as presented, you can see Serial.begin(9600).
Look again at the most recent graphic. See "9600" in the lower left? That can be set to a different number, if you have reason to do so. But the number there and in the Serial.begin line must match.
c) Near the "9600" we were just talking about, you can see "No line ending". What's there shouldn't matter to our simple use of the serial monitor to send data to the Arduino, but I hope you will go beyond our simple use! When you do, you may or may not want to leave the setting at "No line ending". I would tend to leave it thus.
The program presented is, of course, very, very simple, crude.
What's next is up to you! Now that you know how to send characters to the Arduino from "the big computer", I hope you will find the skill let's you create programs that do things which amuse you... or at least are useful.
If you visit 1&1's site from here, it helps me. They host my website, and I wouldn't put this link up for them if I wasn't happy with their service.
Click here to visit editor's Sheepdog Software (tm) freeware, shareware pages.
Click here to visit the homepage of my biggest site.
Click here to visit the homepage of Sheepdogsoftware.co.uk.
![]() Page tested for compliance with INDUSTRY (not MS-only) standards, using the free, publicly accessible validator at validator.w3.org
Page tested for compliance with INDUSTRY (not MS-only) standards, using the free, publicly accessible validator at validator.w3.org
....... P a g e . . . E n d s .....